


Home Gym Essentials: How to Build a Basic Home Gym
You don’t need a super expensive, state-of-the-art home gym setup to make amazing strength and muscle gains from the comfort of your own home.
In this article, I’ll lay out the home gym essentials you need for a simple, yet effective and budget-friendly setup. This does NOT mean skimping on quality. It means buying for value on these key pieces of equipment:
- Squat Rack
- Barbell
- Weight Plates
- Adjustable Bench
- Adjustable Dumbbells
- Flooring
Here’s what you should look for in each equipment category.
Squat Rack
There are many types of squat racks out there, including:
- Power Racks
- Half Racks
- Open Racks
- Squat Stands
For most people, especially those focused on strength training, I recommend buying a power rack. A power rack is a fully enclosed cage in the front, back and top, designed for safely performing all types of barbell movements, especially squat and bench press.
Of course, there are many power racks out there. Which one should you get?
Well, since this is about home gym essentials, I would recommend sticking with a simple 4 post power rack (2 uprights in the front, 2 in the back) instead of a 6 post rack (2 extra posts in the back for storing weights and other accessories).
To get even more specific, here are the 3 types of 4-post racks I’d recommend for a basic home gym setup:
- Bare-bones budget power rack: This type of rack will usually have thinner 12 gauge steel, 2”x2” uprights, 1” holes with 3 or 4 inch hole spacing, and a ~800 lb weight capacity rating. These will run you from around $300 to just over $400. If your budget is tight, this will get the job done.
- Basic modular power rack: This type of rack has thicker 11 gauge steel, 2”x3” uprights, ⅝” holes, Westside hole spacing (meaning that the holes near the bottom of the rack are closer together and the holes in the middle & top are further apart), and a 1000+ lb weight capacity. There are a few rack attachments available for these that let you do more exercises in/on the rack. The price ranges from around $500 to $850. These are a decent bang for your buck, but if you have just a little extra cash, go with the next option.
- Upgraded modular rack: This type of rack is like the basic modular rack (described above) except it has larger 3”x3” uprights. Also, there are a lot more rack attachments available from many manufacturers for this type of rack (3”x3” with ⅝” holes) compared to the 2”x3” style. The price range is from around $650 to $1000+. This is my top pick if you have the budget for it because the price isn’t crazy (especially compared to option 2) but the utility and future expandability you get is much greater than the other options.
If you want something fancier, look into 3”x3” modular power racks with 1 inch hole spacing. These are the beefiest racks out there with the most rack attachments available. However, the price jumps up a fair bit compared to the above options.
Barbell
The barbell is the tool you’ll be using most in your gym.
It’s the only thing separating you from the weight that’s loaded onto it. So for safety’s sake, the most important thing is that you don’t buy a crappy barbell. Luckily, these days there are so many good options out there that it’s easy to find a good one.
Follow these basic guidelines to avoid buying a bad barbell:
- If you’re buying new, the cheapest “good” barbell I’ve seen is around $200; sometimes you’ll find them for less when on sale. Most quality barbells will be closer to $300+. You can go way higher, but it’s not necessary for a basic home gym.
- Avoid bars with hex bolts in the end caps. These easily come apart over time.
- Avoid extra-thick barbells (e.g. ones that are over 29mm thick). These barbells are made thicker-than-usual to compensate for cheaper/weaker steel used in manufacturing.
Here are some more specific barbell buying tips to ensure you pick the right barbell for your training needs:
- If you’re a powerlifter, buy a power bar. This is a bar with a 29mm shaft, powerlifting knurl marks, aggressive knurling (for better grip), and center knurling (to keep the bar on your back for squats).
- If you’re an Olympic weightlifter, buy an Oly weightlifting bar. This is a bar with a 28mm shaft, bearings or good quality bushings (for better sleeve spin on the Olympic lifts), Olympic knurl marks, medium knurling, and a soft center knurling.
- If you do CrossFit or a mix of both powerlifting and Olympic lifting exercises, get a multipurpose barbell. This is a bar with a 28.5mm shaft, decent bushings, dual knurl marks, medium knurling, and (usually) no center knurling.
Weight Plates
Your barbell is no good if you don’t have weight plates to load onto it.
There are a bunch of weight plate categories and subcategories. Since we’re focused on building a basic home gym, I’ll give you my top 2 options that will do the trick for most lifters:
- Cast iron weight plates: These are the basic type of iron plates you’ll find in most commercial gyms. There are tons of these out there, from many different brands. The cheaper ones will have more variance in the accuracy of their weight. The more expensive ones (e.g. machined cast iron plates) will have tighter tolerances. If you’re NOT going to be doing Olympic lifts where you’re dropping the bar from overhead, go with cast iron plates. When buying new, prices start at about $1.80 per lb for 45 lb plates, with smaller plates costing more.
- Economy black bumper plates: These are the most basic type of bumper plate, which is a rubber weight plate designed to absorb impact. They’re ideal for lifters who will be dropping the bar from overhead. This includes Crossfitters and Olympic weightlifters. They can also be the right choice for you if minimizing noise during workouts is important. When purchased new, economy bumper plates start at around $2.20 per lb for 45 lb plates, with smaller plates costing more.
Adjustable Bench
The next piece of equipment you’ll need for your home gym is an adjustable weight bench.
There are dedicated flat benches as well, which are nice to have specifically for flat bench pressing. However, I don’t recommend getting one if you’re only trying to build a basic home gym. You can still perform flat bench press on an adjustable bench without a problem
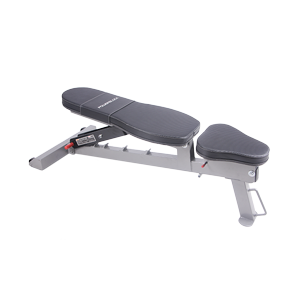
I recommend a Flat/Incline/Decline (FID) adjustable bench for most people. It gives you all the variety you need for a ton of different exercises. This includes all the different bench press variations as well as many other movements like seated shoulder press, chest supported dumbbell rows, hip thrusts, Bulgarian split squats and many more.
If you want to do decline ab work, look for a model with a built-in leg holder.
You should look for an FID bench with a 1000 lb weight capacity. You want it to be built solid so it’s durable, stable and sturdy enough that you won’t outgrow it when you get stronger.
Make sure the height is around 17” tall (give or take an inch). That’s the ideal benching height for most lifters.
You should expect to pay around $300-400 brand new for an adjustable bench like this.
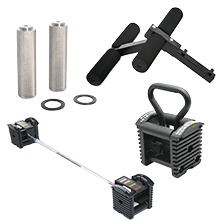
Adjustable Dumbbells
Adjustable dumbbells are the first item on this list of home gym essentials that I consider “optional.” However, of all the “optional” equipment you could buy for a home gym, adjustable dumbbells are #1 in my view.
So if you have the budget for these, I do highly recommend getting a pair.
They give you more freedom of motion than a barbell. This not only gives you greater exercise variety but it can also make certain movements easier on your joints.
I recommend a pair of adjustable dumbbells over a full set of fixed dumbbells for a couple of reasons:
- Adjustable dumbbells are super compact. One pair gives you all the same adjustable weight increments as a fixed dumbbell set while taking up a fraction of the space. Every square foot matters in a home gym where space is limited.
- Adjustable dumbbells are MUCH less expensive than a full set of fixed dumbbells. You’ll save at least $1000.
There are a lot of adjustable dumbbells on the market. I recommend getting a set that can potentially go up to heavier weights (e.g. 70-90+ lbs per dumbbell). Many adjustable dumbbell sets top out at 50 lbs. While that may be fine for some lifters, you’ll eventually outgrow that weight on many exercises if you’re serious about strength training.
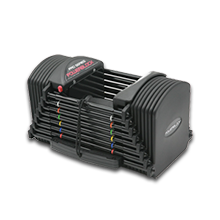
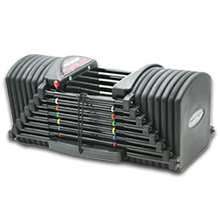
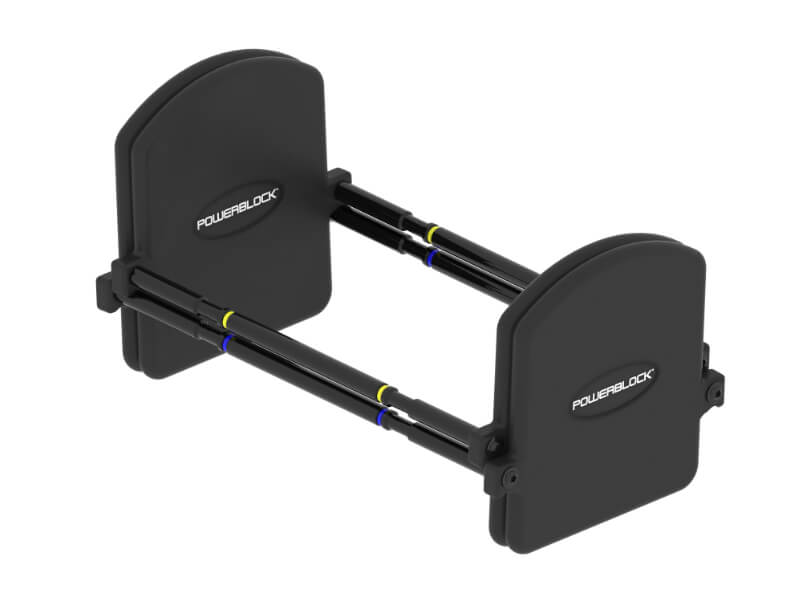
I think the best adjustable dumbbells for most people are the PowerBlock dumbbells. I may be biased because I own a pair myself, but I’ll tell you why I like them and recommend them to others:
- The weight change process is fast, yet they’re still very durable. Most rapid change adjustable dumbbell sets are very easy to break (often due to having lots of small, moving plastic pieces). However, the PowerBlocks have a simple yet robust design. Meanwhile, the extremely durable adjustable dumbbell designs on the market are usually very slow to adjust.
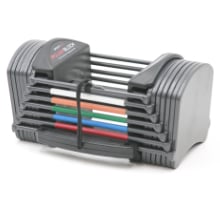
- If you’re on a budget, you can buy a base set first, like the Elite USA Stage 1 (up to 50 lbs). Later on as your strength increases, you can buy one or both of the expansion kits to get up to 70 or 90 lbs.
Regardless of which adjustable dumbbell brand or design you get, expect to pay $400-1000, depending on the model and weight limit when buying new. If you find something that’s significantly less expensive, it’s probably lower quality.
However, there is one (potentially) cheaper option that doesn’t mean lower quality. That is, to buy a pair of loadable Olympic dumbbell handles that you can put your existing weight plates on. If you go this route, it’s a good idea to buy several pairs of 10 lb plates if you don’t already have them. This is because 10 lb plates are generally the largest diameter plate that’s comfortable to use on loadable handles.
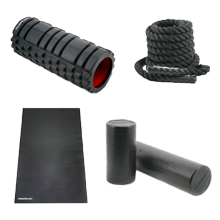
Flooring
Gym flooring protects your floor against damage from dropping weights and moving your equipment around. Likewise, it protects your equipment against damage from the bare floor.
Flooring is arguably the first thing you should get when setting up your home gym. It can be a major hassle to install if you already have all of your equipment in place. You’ll have to move everything out of the way, put down the mats, and then move the equipment back in place.
My biggest advice here is to NOT buy lightweight foam tiles. These are cheap, but they’re not effective. They offer no real protection and they’ll slide all over the place. They also don’t provide a solid foundation to stand on; they’re foam, so they will compress under load.
Instead, you should buy thick rubber mats. I recommend buying horse stall mats, which are 4 ft x 6 ft and ¾” thick. You can get stall mats at your local feed store or farm store (e.g. Tractor Supply Co.) for about $40-50 per mat. Local pickup means no shipping costs!
Get enough mats to cover your equipment area as well as any extra space that you’ll be exercising on. You may need to cut some of the rubber mats to fit your space tightly, so pick up a utility knife if you don’t have one already.
Tips for Saving
Here are a few final tips that can save you a nice chunk of change when you’re shopping for your home gym equipment:
- Buy used equipment locally: Facebook Marketplace, OfferUp and Craigslist are your best friends here. There’s a big market of second-hand gym equipment out there — particularly if you live in a more populated area. There are some crazy deals to be found if you’re diligent, patient, and if you act fast when you find the right piece.
- Prioritize the items you need most: Maybe you can’t afford all the pieces of your home gym at once. That’s very common and not a huge problem. The solution is to buy the most important pieces of equipment first, then start saving to get the rest. In terms of priority, it depends on your goals. But barbell and weight plates will always be among the first items you’ll need.
- Buy everything at one retailer: If you’re buying everything new and at the same time, try getting most if not all of your equipment from the same place. This can save you a lot on shipping costs and you might even get a discount when you spend a certain amount.
It’s Time to Start Building!
Now you know how to build a basic but highly functional home gym that you can enjoy for many years to come. The only thing left for you to do is shop around, find the pieces you want, and then pull the trigger.
You won’t regret it. Building a home gym is one of the best investments you can make for yourself!